How To Create Downloadable Products in Magento 2
According to Magento docs,
A downloadable product is a variation of a simple product, with a little difference in product shipping. Products are not physible and it can be download from the store with price or without price.
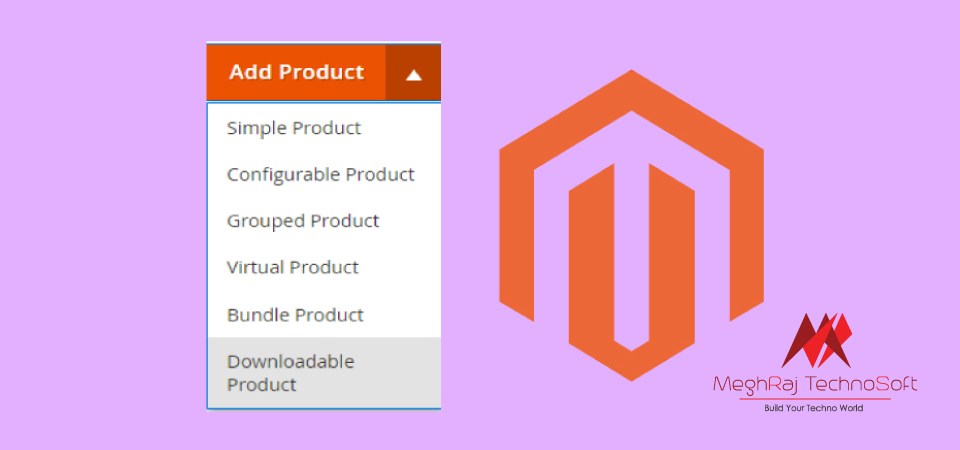
There are six product types in Magento 2:
- Simple Product
- Configurable Product
- Grouped Product
- Virtual Product
- Bundle Product
- Downloadable Product
Among these, let’s discuss more downloadable products and the steps to create a Magento 2 downloadable products from the admin panel!
We have to upload files via the back-end to the server through the admin or FTP before allowing a downloadable product. No shipping options are offered as far as there is nothing to be shipped. It’s up to us to decide whether our customers will be able to choose the files to be included in the purchase.
Include its price (if any) and other additional information. There is a possibility of hosting the files on another web server.
Mind that this type of product may consist of one or more downloadable files, so you have the option to require all of them to be purchased.
After the link is generated, the customer is capable of accessing all the downloadable files purchased from the account’s corresponding section.
But in this scenario, we risk our file will be stored and shared with someone else.
An example of Magento 2 downloadable product is Magento extensions, applications, games, software, music files, E-books, etc.
Simply follow the below steps to create downloadable products in Magento 2.
Or, you can create downloadable products programmatically in Magento 2!
Steps to create Downloadable products in Magento 2:
- Login to admin panel
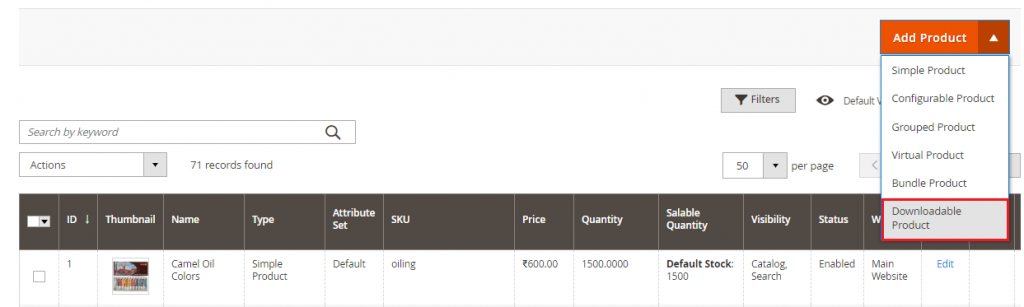
- Navigate to Catalog > Products
- Under the Add Product menu, select the Downloadable Product in the upper right corner.
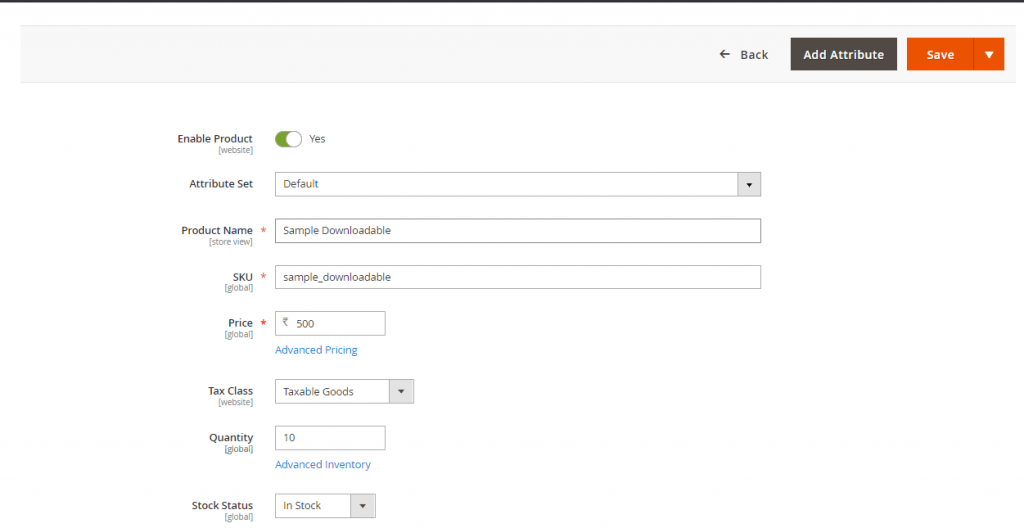
Fill the below details after enabling the product:
- Attribute Set – Select the attribute set as default or create an attribute set.
- Product Name – Enter the product name
- SKU – Enter the SKU of the product. However, Magento takes the product name as the default SKU
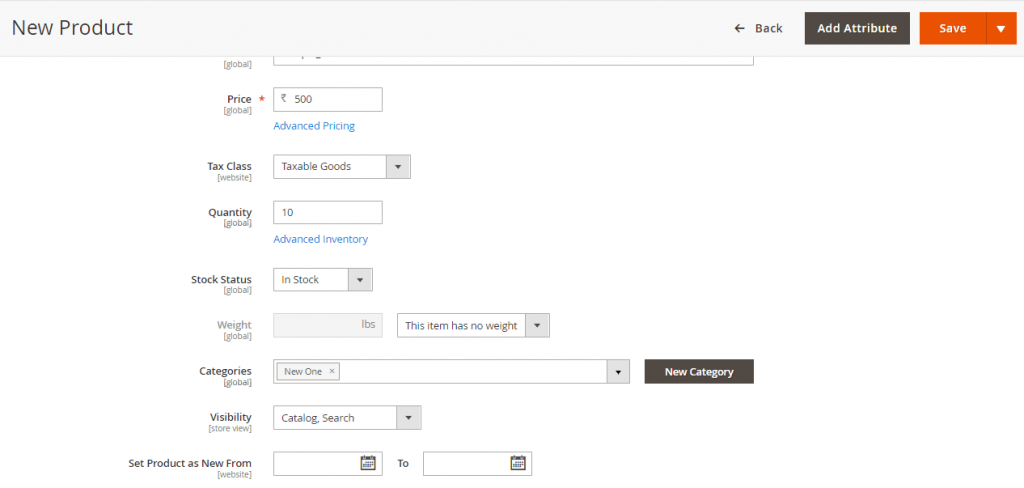
- Price – Set the price of the product.
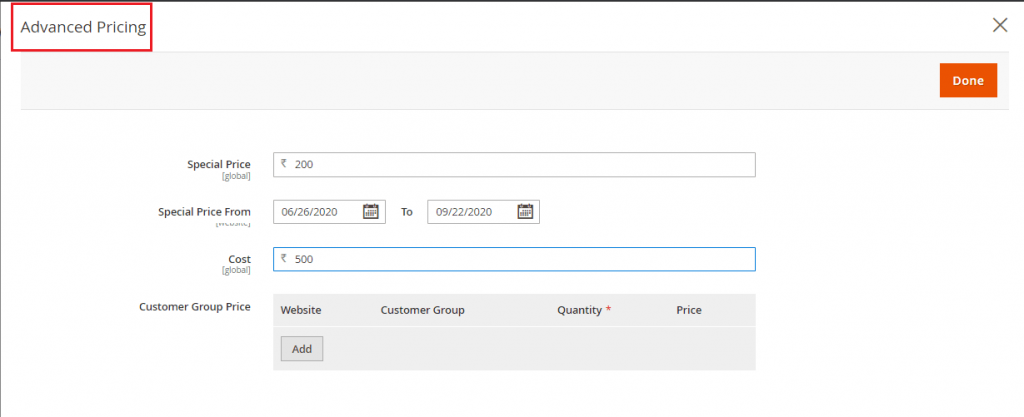
Advanced Pricing
- Special Price – Enter the discounted price
- Special Price From & To – Set the start and end date of the discount availability
- Cost – The actual cost of the product
- Tier Price – The discount price offered to customers based on the customer group and website. Here, select the quantity and price for every customer group.
- Tax Class – Select None or Taxable Goods
- Quantity – Enter the quantity of the products that are currently in stock
- Stock Status – Set the stock status accordingly. Here, the default value is In Stock.
- Weight – Enter the weight of the product
- Categories – Assign categories to the product using Select box and choose the existing category or create a new one.
- Set Product As New From – Set the dates to feature the product as new
- Country of Manufacture – Select the country name from the drop-down
- Content
- Description – Enter the main product description for displaying on the product page
- Short Description – Enter the short description, mainly for the RSS feed or product page, catalog page, etc.
- Images and Videos
Add images and videos to display on the product page using the popup or drag-drop functionality.
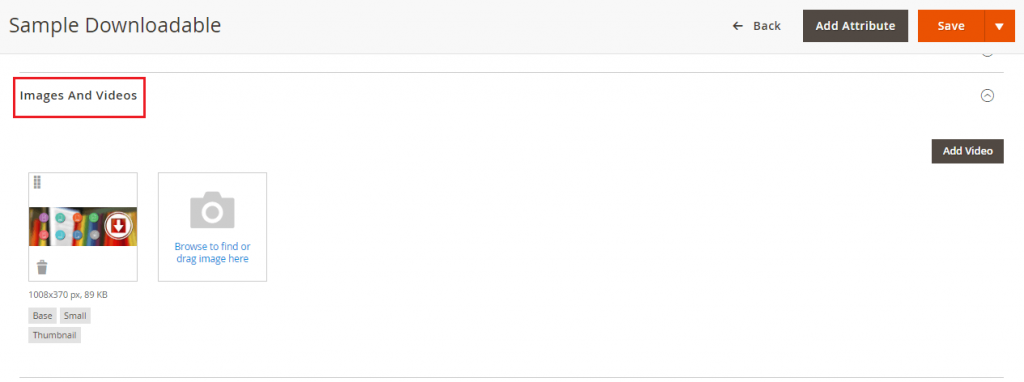
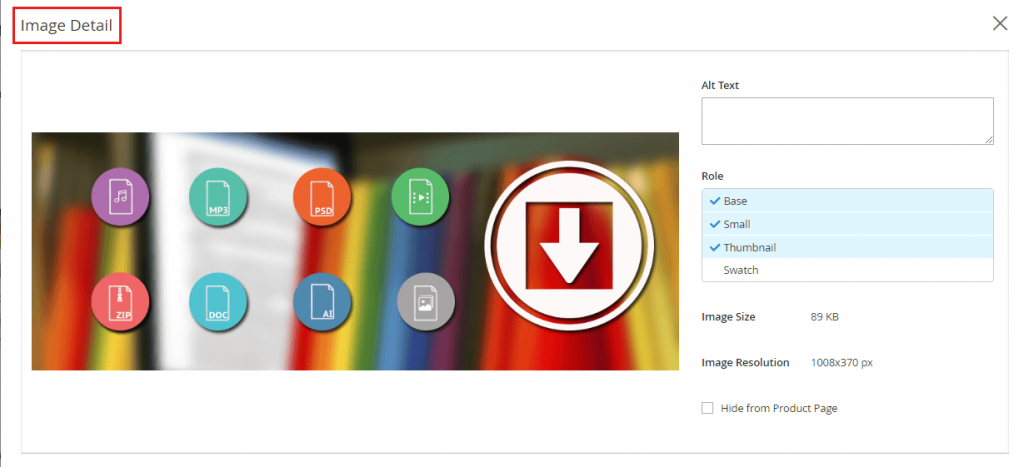
Click on the image to fill up the details like Alt Text and Role:
- Alt Text – Enter the content to describe the image or to display in the case when the image is not loaded.
- Role
- Base – Main image for the product page
- Small – Image for listings on category and search results pages, and for sections such as for Up-sells, Cross-sells, and the New Products List.
- Thumbnail – Images for thumbnail gallery, shopping cart, blocks like related items.
- Swatch – Used to illustrate the color, pattern, or texture.
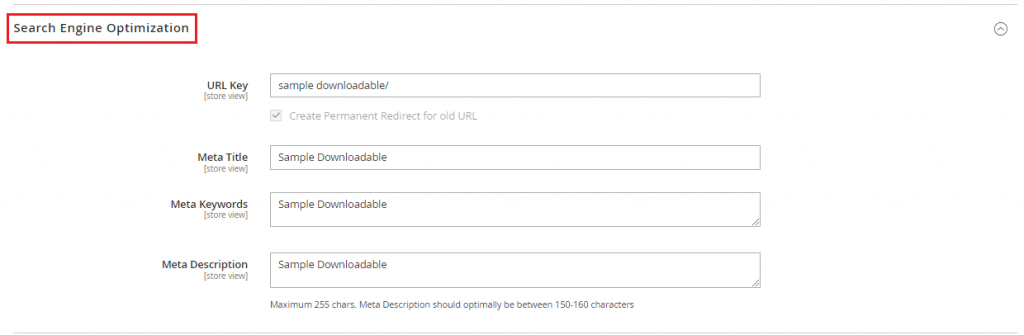
Search Engine Optimization
- URL Key – Enter the URL key for the online address of the product
- Meta Title – Enter the title for the display in search results. The default meta title is based on the product name.
- Meta Keywords -Add relevant keywords for more visibility in search results.
- Meta Description – Enter the description of the product for display in the search results.
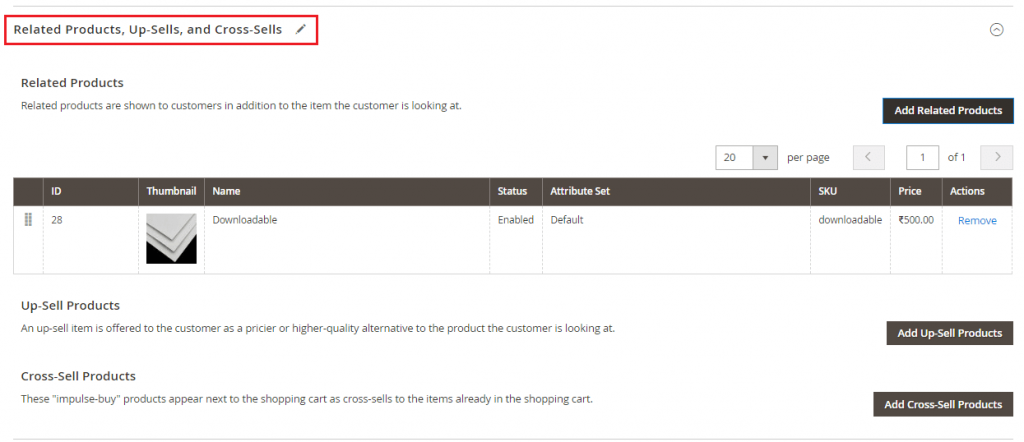
Related Products, Up-Sells, and Cross-SellsUsed to promote other products in the store
- Related Products – Add products that are supposed to be purchased in addition to the item the customer is viewing.
- Up-Sells Products – Add products that are similar to the product that you are creating but probably higher quality
- Cross-Sells Products – Add products that are offered on the shopping cart page as last-minute purchases before the checkout process begins.
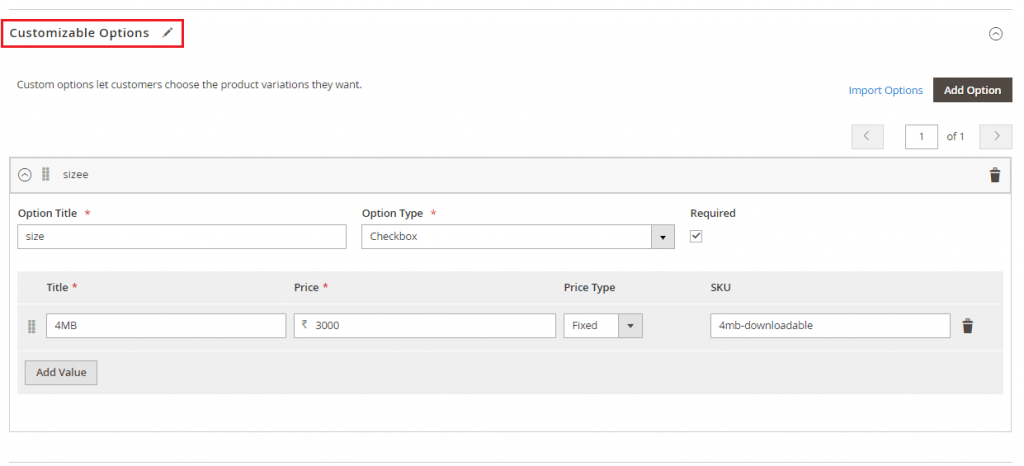
Customizable Options – Configure this option to offer customers a selection of options with a variety of text, selection, and date input types.
Products in Websites
Select the option where the product is available as per the store hierarchy. By default, for a single website installation, the website checkbox is marked.

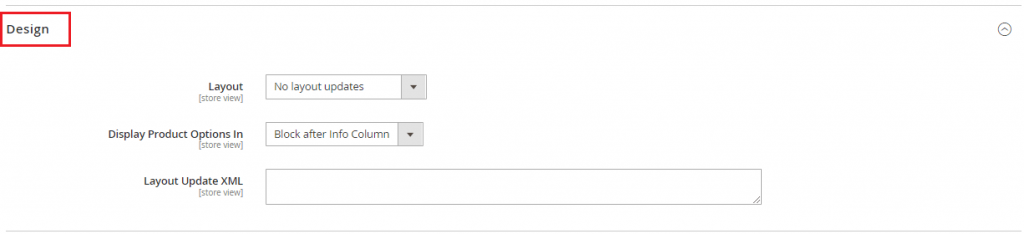
Design
- Layout – Choose a layout from the dropdown
- Display Product Options In – Select where the product options appear on the product page from the drop-down menu
- Layout Update XML – Enter XML code in case of customizing the theme.
Downloadable Information
- It’s the main part of the Downloadable products and that consists of two parts.The first one is for a link that allows applying downloadable links in our product and the other one is for sample file where we can apply URL or upload it from the upload file option.After expanding Downloadable Information click on the checkbox which asks for is this downloadable product?
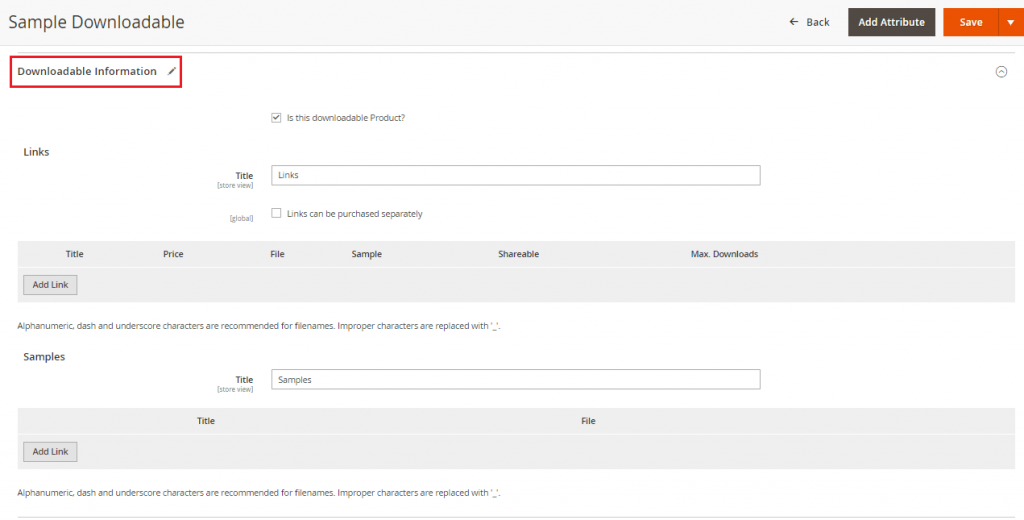
Let’s expand the first option -Links
- Title: Give the title to your link that you want to use as a heading for the download links from the Title option.
- Price: If you want to add price to your link then click on the checkbox Links can be purchased separately.
- After clicking that checkbox, the price textbox will be enabled.
- In the options section :
- Give a suitable title and price if there is the option of price
- Next, choose an appropriate option from file and Sample columned dropdown.
- The first option of that dropdown is an Upload file in which we have to browse the file by clicking on Browse files… option.
- Shareable: Set Shareable to one of the following:
- No: That means, it Requires customers to log in to their accounts to access the download link.
- Yes: Sends the link by email, which customers can share with others.
- Use config: Uses the method that is specified in this product’s configuration.
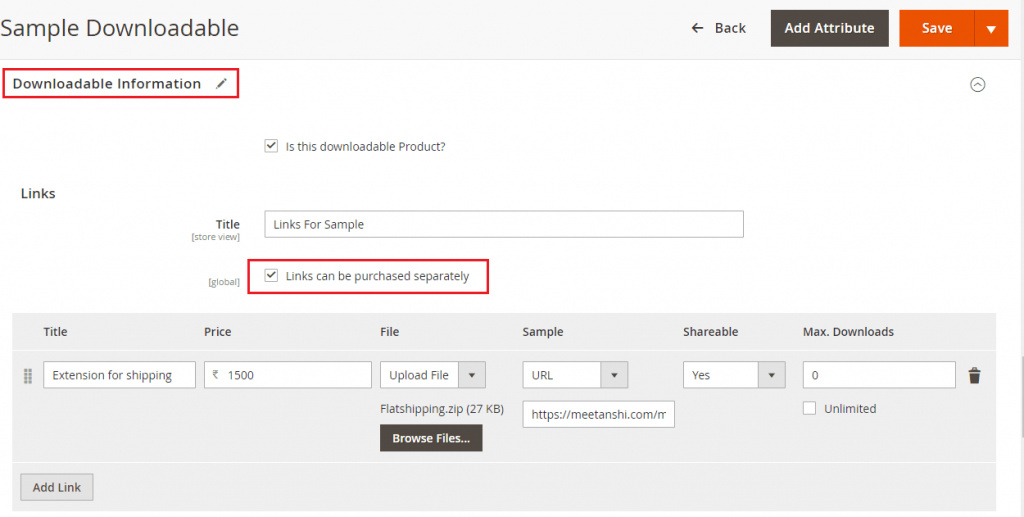
- Max. Downloads:
- To limit downloads per customer, enter the number of Max. Downloads.
- If you want to allow unlimited downloads, select the Unlimited checkbox.
Finally, Click on Add link to add another link.
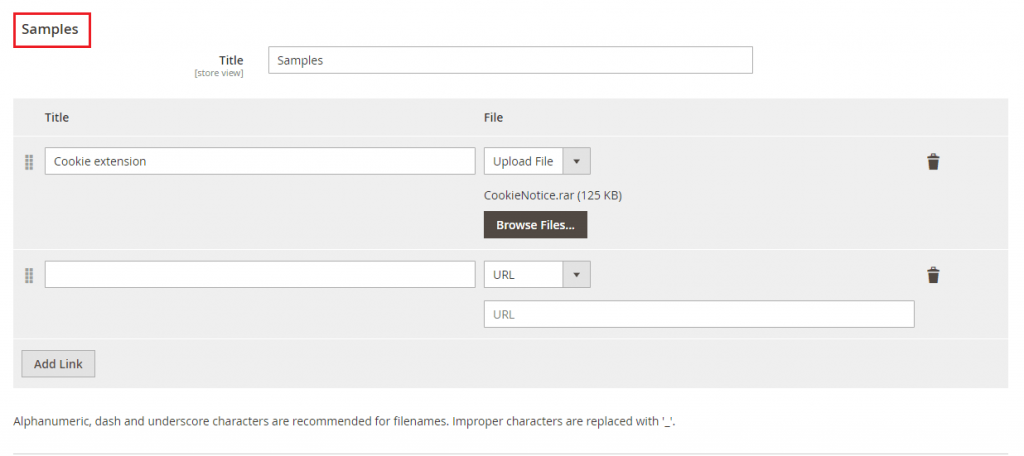
- Samples:
- Title: Enter the Title that you want to use as a heading for the samples in the Samples section.
- Add Link: To add a link on the samples section, click on the Add link button.
- The next step is to enter the Title of the individual sample.
- And select the distribution methods
- Upload File: To upload the distribution file to the server, Browse the file, and upload.
- URL: To access the file from a URL, Enter the full URL to the download file.
That’s all for Magento 2 Downloadable Product.
If you need to create a custom product type, visit here.
You may use the Comments section below to mention any doubts on the topic.
Do share the tutorial with beginners in Magento 2 via social media.
Thank you.